Search This Blog

Showing posts with label Food. Show all posts

Wednesday, October 24, 2018

Bone Broth Made Easy

Homemade bone broth is so satisfying and healthy. It is full of minerals and gelatin and flavor! - You can read all about that on other sites. - Bone broth (or stock) can also be a great way to use up scraps and leftovers. Here is a simple method that can be altered as you like:

Ingredients

Bones and meat scraps
Chicken feet
Vegetable scraps
Onion, Celery and Carrots
Apple Cider Vinegar
Slow cooker

Planning Ahead


1.) When you eat meat that has bones in it, save all the bones and put them in a container in the freezer. As you go through more bone-in foods, just keep adding the bones to your stash. If people have chewed on them, don't worry. They will be frozen and then cooked long so no contaminates will transfer to your broth.

Also, save any trimmings that you cut off meat: skin, fat, parts and pieces and add this to your freezer container.

2.) When you see a great sale on chicken, buy a few pieces of the cheapest cut (wings or legs) to add extra flavor to your broth. You can just reserve these in the freezer until broth cooking time. Also, pick up a package of chicken feet when you see them. You won't need many and usually a package will last for 4-5 batches.

3.) A week or so before making your bone broth, start saving the scraps and ends of vegetables that you might otherwise compost or throw away. I save almost everything except cruciferous vegetables (cabbage, broccoli, kale, cauliflower) as I don't like the flavor these impart to my stock. Keep these in a container in the refrigerator. If you are making bone broth pretty regularly you can just have an ongoing supply of these additions.

Making the Broth

 When you have plenty of bones, it's time to turn them into liquid gold! Place them in your slow cooker. Add 2-4 chicken feet, a couple of wings or legs and all your reserved vegetable scraps. Go through the refrigerator and find any leftovers that might be a good addition to the stock: green beans, tomatoes, zucchini, parsley or cilantro... almost anything that needs to be used up can go into the pot! If you add something that is highly seasoned, that will of course transfer to your bone broth so just be aware. Add some extra chunks of onion, carrot and celery.

Now cover the bones and vegetables with water. Don't add too much or your broth won't be very tasty. Just barely cover the majority of what's in the pot. Add 2 Tablespoons of apple cider vinegar. This helps leach all the minerals out of the bones. Let this all sit for 30 minutes to an hour to give the vinegar time to get working.

Turn the slow cooker on high until things get good and heated up then turn down to low and cook for about 8 hours. You can cook it all day or start the slow cooker before bed and let it simmer through the night.

Strain out all of the chunks and your broth is ready to eat or store! That's it!


Variations


One of the great things about homemade bone broth is that the variations are endless. You can use chicken, beef or pork bones or any combination. Did you forget to pick up celery? No problem, just leave it out. Do you like garlic flavor? Put a few cloves or a whole head in.

If you make a big batch, you can freeze the extra broth for future use. Just be sure to label it well. It's difficult to distinguish different stocks in the freezer!

Friday, September 7, 2018

Naturally Fermented Sour Kraut

Sour Kraut

If you are thinking of fermenting your own sour kraut, you probably already know all about the beneficial pro biotics and you might know how great it tastes. It's easy to make if you follow my practical instructions!

For 1 quart of kraut you'll need:

1 small to medium cabbage (the fresher the better.)
1 wide mouth quart jar
1 1/2 pint jar with lid for weight
Large mixing bowl
salt with no additives

Optional Equipment:

Kitchen scale
Electric Slicer
Fermenting Crock

Start by peeling off the outer leaves of your cabbage just to clean it up. Save the nicest piece of leaf to lay on top of your ferment. Cut out the cabbage core. Don't worry if you can't get it all.

Weigh the bowl you will be using to toss the cabbage and salt together. If your scale can measure in grams, use this setting. You can be a little more accurate with small measurements in grams. Write this number down.

Slice or chop the cabbage. The size is totally your own preference. I often slice mine with a kitchen knife but an electric slicer can save you time if you are processing 2 or more cabbages. When using an electric slicer, you will still need to chop some of the uneven pieces with a chef's knife.

Place all the cut cabbage into your mixing bowl and weigh it. Now subtract the weight of your bowl. The resulting number is the weight of your cabbage. Divide the cabbage weight by 50. This final number is the amount of salt you need to add to the bowl. This can be calculated in grams or ounces; just be sure you stay consistent! Here is the formula:

Grams of cabbage / 50 = grams of salt to add

Leave your bowl of cabbage on the scale and add salt slowly until the scale shows the grams needed. A word about salt here: most salt has additives to keep it from caking. Read your label carefully. Kosher salt, canning salt, table salt and some sea salt are all no-no's for sour kraut.

If you don't have a scale, you can still make sour kraut. A small head of cabbage takes about a Tablespoon of salt; a medium head, about 1 1/2 Tablespoons.


Once your salt is added, stir it in well. You can use a big spoon or just use your hand. Once the salt is incorporated well, you will feel that the cabbage is starting to sweat a little. Add the salted cabbage to your quart jar (or crock) one handful at a time, packing down each layer firmly. There is no need to pound the cabbage; just press down with the back of your hand or a wooden spoon. The goal is to leave no air space. A small to medium head of cabbage with fit in a quart jar. It looks like a lot after it's chopped but if you pack it in as you go, it will all fit!

You can use any glass or crock container for sour kraut. In these photos I'm using an antique crock that my mother in law gave me. (If you use something besides canning jars be sure to test them for lead with a test kit you can order online or pick up at some hardware stores.) You can also purchase special fermenting containers that have air-locks to help keep contaminants out of your sour kraut. Kraut is pretty forgiving so I encourage you to start with supplies you most likely already own before jumping into some high dollar equipment.

Once the jar is loaded, lay the reserved outer cabbage leaf on top. Press it down so it is snug on top of the chopped cabbage. (In these photos I have used a saucer that fits nicely inside my crock.) Fill your 1/2 pint jar with water and screw the lid on. This fits right into the mouth of the quart jar to weight down the fermenting cabbage. Place the fermenting jar in a pie pan or baking dish. Sometimes the water buildup is so great it overflows!


I like to leave my fermenting sour kraut in my kitchen until I see the water level rising above the chopped cabbage. This can happen right away or may take several hours. Once I see that it is well underway, I move it to a cooler location. My kitchen tends to be a little too warm for vegetable ferments. The refrigerator would be too cool to get the lacto-bacilli moving! A temperature range of 65-71 degrees is what you want. Also, keep your fermenting kraut out of sunlight.

I check my kraut about every 3 days. You can start to sample it after a week or so. When it reaches the flavor you like, just refrigerate it. It's that simple! I usually plan about 10 days to 2 weeks for mine.

If you find that your water level is decreasing, you will need to add a brine to keep the cabbage covered and out of the air. To make a brine, add 19 grams of salt to 1 qt. of non-chlorinated water. Add just enough of this solution to your jar to keep the cabbage submerged.

Thursday, June 7, 2018

Slow Cooker Chicken and Spinach

Like many slow cooker recipes, this one takes a little preparation, but it's great to come home to a (mostly) prepared meal when you need to be away right before supper!

The recipe serves 2 but I add extra chicken so that I have leftovers to make other recipes. You can save money by purchasing a whole chicken and cutting it into pieces yourself. 

This Slow Cooker Chicken and Spinach recipe can be the start of a meal progression that spans several days if you plan ahead. Here's an example of what I mean:

Day 1: Crockpot Chicken and Spinach (with extra chicken.)
Same night: Chicken bone broth with added pieces.
Day 2: Chicken Salad with leftover chicken.
Day 3: Chicken Vegetable Soup.

I'll expand more on this in another post. For now, lets look at what you need for the

Chicken and Spinach Recipe:


1 Whole Chicken, cut up (or about 8-9 pieces of chicken.)
Salt & Pepper
1 large onion, chopped
1 T. butter or lard
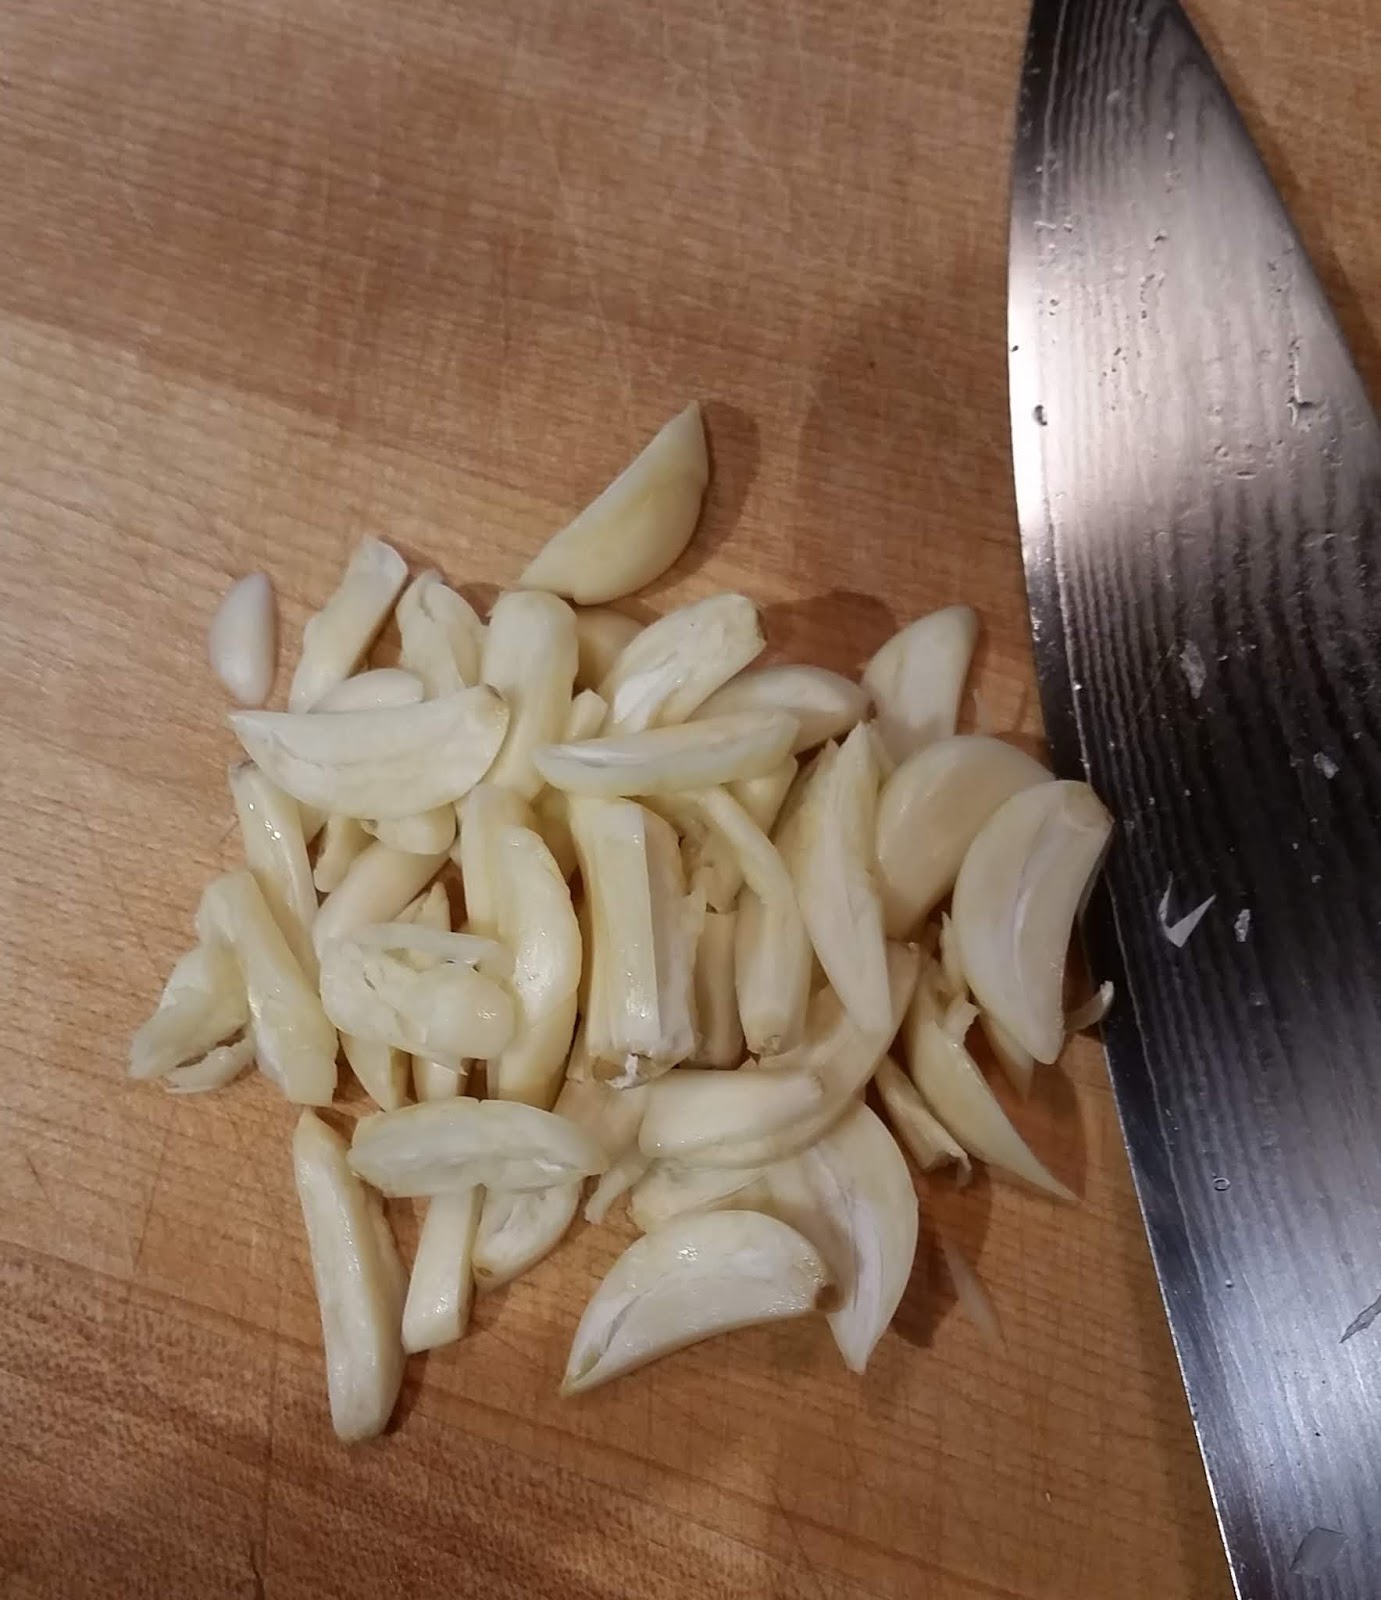
8 garlic cloves, sliced
4 t. tomato paste
1 t. paprika
1/4 t. crushed red pepper
1/2 c. water
8-12 oz. fresh spinach
1/2 c. raisins
Juice of 1/2 lemon
2 T. sunflower seeds (pecans or pine nuts work as well.)

Cut up chicken and generously season pieces with salt and pepper.

Heat butter or lard in a frying pan. Add chopped onion and cook for a few minutes. Add sliced garlic and cook until starting to brown.
Sliced garlic is a nice alternative to crushed or minced.

Add tomato paste, paprika and red pepper to frying pan, stir to incorporate. Add 1/2 c. water and mix well.
Pour tomato mixture into slow cooker. Add chicken pieces, turning them over to coat with sauce. Cook on low about 3 hours.
Pull out chicken and add fresh spinach to slow cooker, stirring to coat with remaining sauce. Mix in raisins. Lay the chicken back in the cooker on top of spinach. Cover and cook on high another 20 minutes or so.
Remove chicken to a serving plate and stir lemon juice and nuts into spinach. Serve.


The Best Homemade Mayonnaise


If you are interested in making your own

mayonnaise

 this is the best recipe and method I have found.
I'm not going to reprint it; just visit this link!

It's the best!

You'll love it!

https://howtofeedaloon.com/classic-homemade-mayonnaise/

(This mayonnaise is great in my Ranch Dressing recipe or Chicken Salad!)


Friday, May 18, 2018

Crock Pot Ratatouille

Just in time for the burgeoning farmers' markets, you'll want to try this

Ratatouille!


This recipe does involve a lot of chopping! Since you can make it ahead it's a great choice for a busy day!

One recipe will serve 4 people as a main dish and 6 as a side veggie, so cut it in half if there are only 2 or 3 of you.

1 med. eggplant (about 1 lb.) cut into 3/4" pieces.
1 1/2 t. Salt.
3 T. Olive Oil.
2 T. Tomato Paste.
1/4 t. Pepper.
5 Roma Tomatoes, diced.
2 med. zucchini and/or yellow summer squash, cut into 3/4" pieces.
1 lg. Sweet Pepper (red, orange or yellow) cut into 1/4" pieces.
1 lg. Onion, sliced into half-moons.
4 lg. Garlic Cloves, sliced.
1 t. Dried Thyme (or 1 T. fresh, chopped.)
1 Bay Leaf.

Fresh Basil Leaves for garnish.

Place the eggplant in a colander set over a bowl and toss with 1 t. of the salt. Allow to sit and drain for at least 30 minutes. Rinse with cold water. Lay the eggplant out on a towel and pat dry.

Whisk together oil, tomato paste, 1/2 t. salt and pepper.

Combine the drained eggplant, tomatoes, squash, sweet pepper, onion, garlic and thyme in a slow cooker. Add the oil and tomato paste mixture and stir to incorporate. Cover and cook on low for 4 hours. Uncover and cook 1 hour more to cook down some of the liquid.

Remove the bay leaf. Garnish with Basil (whole or sliced leaves.)

Taco Seasoning

OK, I don't know why I wasn't on this years ago, but in case someone out there still doesn't make their own

Homemade Taco Seasoning...


...here is a recipe to start with! 

These measurements make about 2 ounces, so double it to fill up a half pint jar. Use about 2 Tablespoons of the mixture per pound of meat when cooking.

As always on Practically Margaret, change up the ingredients and quantities to suit your own tastes (or to accommodate what you actually have in the cupboard!) Keep it practical and stress free!


2    T. Chili Powder
1    T. Ground Cumin
1    T. Salt
1/2 T. Pepper
1/2 T. Paprika (smoked, sweet or regular)
1     t. Dried Oregano
1     t. Garlic Powder
1/2  t. Onion Powder
1/8  t. Cayenne Pepper


Place all ingredients in a jar and shake to mix. Keep sealed and store with your other spices.


After you have your taco seasoning prepared, you'll be ready to make my

  Crockpot Taco Soup! 

It cooks all day and is ready for you when you want it. It also freezes well, so don't worry about left overs. Adios for now!

Friday, May 4, 2018

Easy Peel Hardboiled Eggs

Don't you hate it when you are peeling hardboiled eggs and 1/2 the whites come off with the peel? Especially when you are trying to make deviled eggs. Instead of looking like perfect little egg boats, they are one unappetizing mess!

Well, there are just a couple of secrets to making

 hardboiled eggs 

that 

peel clean and easy every time.


1. Start with boiling water.
2. Add a Tbsp. of baking soda.

That's it! Just to be clear, following are the step by step instructions:

The water needs to cover all of the eggs you'll be cooking, so add eggs to your pan and add water to cover them at least 1/2 inch. Pull out the eggs and leave them on the counter (not back in the refrigerator.) Add a tablespoon or so of baking soda to the water, cover with a lid and bring the pot to a boil.


When the water is at a full boil, carefully lower each egg into the pot with a slotted spoon. Do this slowly giving each egg a little time to adjust to the water as it is lowered. This helps keeps the eggs from breaking during the cooking time.


Replace the lid, cocking it just a little and allow the water to return to boiling. Lower the heat, keeping it just hot enough to continue boiling. Set your timer for 10 minutes. At the end of 10 minutes, remove the pot from heat, remove the lid and let it sit for a few minutes.

Pour off the hot water and add cold tap water to the pot. Pour off this second pot of water and add another round of cold tap water. Add a couple handfuls of ice cubes and let the eggs sit 10-15 minutes.

That's it! You can use the eggs right away or dry them off and store in the refrigerator.

Happy Peeling!


Monday, April 30, 2018

Kale Chips

Kale is an affordable vegetable that is usually available year round. It makes a great addition to stir fry and soups but my favorite way to prepare it is in the form of kale chips.

These are really easy to make! They keep fairly well and are great to keep in mind if you have kale in the refrig that needs to be used. Kale is full of vitamins and minerals. All that adds up to make kale chips a very practical recipe!

To make kale chips 

you'll need:

Kale
Olive Oil
Salt
(Other Optional Seasonings)


Start by washing and thoroughly drying your kale. I spread it out on a big tea towel and blot the leaves dry. Pull out the tough stem and then separate the larger leaves into manageable pieces. You can do this all by hand - grasp both sides of the leaf in one hand and gently tear the stem with the other hand.

Place your dry and de-stemmed kale in a big bowl. Spray or sprinkle olive oil over the top. Using tongs or your hands, toss the oil to cover all the leaves as thoroughly as possible. Add a little oil at a time until the leaves are fairly well coated. You'll be working with teaspoons of oil here, not cups.

Now sprinkle salt or other seasonings on the leaves. Toss again to cover the entire bowl full.

Place the kale in a dehydrator at about 130 degrees until dry and crispy. The time will vary based on your kale and dehydrator but you're looking at 2-3 hours for this.

If you don't have a dehydrator, you can dry the kale chips in your oven. Preheat the oven to the lowest setting possible. Spread your kale in a single layer on a baking sheet and pop them in the oven. Once in, turn the heat off. Remove the chips when they are crispy. If you have a lot of kale, you may need to turn the oven back on after it cools below 130 degrees to get to the desired crispiness!

That's it! Store kale chips in a sealed container so they stay fresh and crispy.

Seasoning Suggestions:

Salt and Pepper
Nutritional Yeast
Italian Seasonings

Thursday, March 29, 2018

Crockpot Taco Soup


Everyone needs a few practical, go to recipes in their arsenal. My definition of practical would include the following attributes:
  • The ingredients can be kept on hand all the time, 
  • It can be easily assembled, and
  • It doesn't need much attention while cooking.

The crockpot is the simplest solution to the cooking requirement and canned or frozen ingredients make keeping things on hand possible.

This Easy Taco Soup meets all of the requirements to put it in the "practical" category. Like most of my favorite recipes, this has a lot of potential for flexibility. If you only have one can of beans or one of the toppings on hand, no problem. The soup still tastes great!

Taco Soup Ingredients:


2 cans Black Beans (drained and rinsed)
2 cans Corn (drained)
2 cans diced tomatoes
1 can Tomatoe Sauce
16 oz. Chicken Stock
1 lb. Cooked Hamburger
1 heaping T. Taco Seasoning (Click here for a recipe to make you own.)


Put all the ingredients in a crock pot and cook on low all day. That's it! Easy, practical and oh so yummy!

Toppings:

Shredded Cheese
Sour Cream
Tortilla Chips
Chopped Cilantro

Substitutions:

Use cooked Chicken or pork instead of beef.
Use your favorite canned beans instead of black beans.
Any broth or stock can be used.

This recipe makes a pretty good sized batch but it freezes well so don't worry about leftovers. I freeze it in small individual size containers that are easy to thaw and reheat for lunch or dinner on your own!

Friday, March 16, 2018

The Best Popcorn


How to Make

The Best Popcorn

You have to start with the best variety of corn kernels and you can usually bet that smaller is better. Our favorites include (in order):
  • tiny white
  • lady finger
  • tiny red
For a good source try Amish Country Popcorn out of Indiana. You can order it online or go through a retailer close to you. Notice that the variety names are "tiny," not "small." If you can't find any of these tiny, hulless varieties and are just buying from the grocery store, I recommend white popcorn.

Next, you need non-hydrogenated coconut oil. If you don't have coconut oil (or don't like it) you can try lard, avocado oil or peanut oil (again my preferences are listed in order.) My husband also likes to use bacon grease ocasionally for popping. - We just agree to disagree on this point.

Next, you need a whirly popper. You can buy these online. The aluminum models will cost $20 - $30 and you can find stainless steel poppers for  $40 and up. You can use a deep saucepan and lid but better and more consistent results come with a whirly popper. If you are serious about popcorn, you'll want to invest in a whirly type popper!

Instructions for Popping Popcorn

  1. Start by melting a generous tablespoon of coconut oil in the popper over medium low heat. When the pan is hot and the oil melted, add 1/2 cup popcorn kernels. Stir and shake until the kernels are completely coated with oil and spread evenly across the bottom of the pan.
  2. Transfer the pan to a medium high heat and stir and shake while the corn heats up. You don't need to be too aggressive about this, but do not leave the popper unattended!
  3. When you hear the kernels begin to pop, turn the heat up to high. At this point, stir the corn continuously while it pops completely. As soon as the popping ceases remove the pan from the heat.
Dump the popped corn into a large bowl for serving. Return the popper to a medium low burner. 

In the warm popper melt 1/2 stick real butter. When the butter is completely melted, pour about 1/3 of it over the popped corn. Toss or stir the popcorn to incorporate the butter. Repeat 2 more times with remaining butter. 

Finally, top the popcorn with salt. Use a good quality salt and try different types. My favorite for popcorn is a french salt call Fleur de Sel. You'll find the flavor changes a little with different kinds of salt.

You can also add other toppings to change up the flavor! Try different combinations of things you already like.

Popcorn Toppings


Fresh Ground Pepper
Nutritional Yeast
Soy sauce or Braggs Amino Acids
Powdered or Shredded Cheese
Dried Herbs
Garlic or Onion Powder


Wednesday, March 14, 2018

Boudin Balls

So this recipe is not quick or easy, but the results are pretty amazing! And you can make a big batch and freeze the leftovers for re-heating. Cook and grind the boudin sausage one day then form and fry the balls on the next.

Boudin Ball Ingredients:

3 lb. Pork Butt Roast
1 1/2 gallons Chicken Stock 
5 T. Kosher Salt
1 T. Cayenne Pepper

14 cloves Garlic
4 cups chopped Onion (about 2 medium)
2 cups chopped Bell Pepper (about 1 large)
2 cups chopped Celery (about 3 stalks)
3/4 lb. Chicken Livers

1 1/2 cups chopped Green Onions (1 bunch)
1 bunch Italian Parsley, chopped

2 2/3 cups, uncooked, Parboild Long Grain Rice (like Zatarains)

2 T. Butt Rub
2 T. Cajun Seasoning
2 t. Kosher Salt

4 Eggs
2 t. Tabasco Sauce
1/2 can plain Bread Crumbs
Peanut Oil 

Boudin Ball Instructions:

Cut the pork butt into 1 inch cubes including all the fat. Place in a large stock pot and cover with chicken stock. Add salt and cayenne pepper. Cook over medium heat for 1 1/2 hours.

Add garlic, onion, bell pepper and celery to stock pot and continue cooking until meat is tender.

Add chicken livers and cook an additional 20 minutes.

Remove from heat and strain the meat and vegetables from the stock. Set the stock aside. While the meat mixture is still warm, mix in the green onions and parsley.

Cook rice according to directions on the package, using the reserved stock in place of water. 

Add 1/2 of the cooked rice, Butt Rub, Cajun seasoning and salt to meat and vegetable mixture. Process the meat mixture in a food processor or food grinder.  You want it to be ground smooth and just dry enough to hold together in a ball shape. If it's too wet, it won't hold it's ball shape and if it's too dry it's difficult to grind and dries out more when cooking. (Add a little of the reserved stock if the mixture is too dry. If you end up with too much liquid in your mixture, you can add bread crumbs to help.)

Stir in the remaining rice and incorporate thoroughly. Chill this mixture completely. I prefer overnight but at least an hour should be allowed.

Beat 2 of the eggs in a flat dish like a pie plate. Add Tabasco sauce and a little water. Pour 1/3 or so of the bread crumbs into a second pie plate and mix in salt and pepper.
Heat peanut oil in a deep fryer on the maximum setting (375 F.) Start forming balls with the boudin sausage. Go slow and easy rolling each ball into a beautiful shape with smooth edges. I like 1/8 cup size balls but make them any size you prefer. Roll each ball in the egg wash then coat completely with the bread crumbs.  Deep fry immediately and drain on paper towels. Replenish egg and bread crumb mixtures as needed.

(This part of the process is really great if you have a helper. Have one person roll and use the egg wash, and another person coat with bread crumbs and fry. Going from the egg wash to the bread crumbs tends to be quite messy!)

Serve hot with Cajun Mustard or cool to room temperature and freeze on cookie sheets. Once frozen, boudin balls are solid enough to be placed together in a ziplock bag in the freezer but before then are somewhat fragile.

To use frozen balls, simply thaw to room temperature then reheat in a 325 F oven!


Tuesday, March 13, 2018

Coffee Substitutes

Do you đź’—coffee?

I love coffee. I love the smell of coffee. I love the taste of coffee. I even love the boost that caffeine gives me.

But... I have trouble tolerating the caffeine.

I get the jitters when I drink too much and I lose my peripheral vision when I really over due it. The worst part for me, though is the headache that comes on the day I don't drink coffee. 
Sure, I can simply drink a cup to ward off the migraine. But that misses the point. 
I have no desire to be under the bondage of anything (or anyone for that matter) including coffee. I hate the idea that every morning, I must have a cup of coffee; that each and every day of my life I must, without exception, get out of bed and seek a cup of java; that my daily mojo wilts without "jo."

For years now, I've made it by with decaffeinated coffee.

But... decaffeinated coffee is frankly, underwhelming.

I still drink decaf but I've found a couple of other options that I choose more often.


Chickory is really a tea brewed from the root of a common herb. The root is roasted and ground and brews up into a dark, rich beverage. It doesn't taste like coffee, but it's a great replacement! Ground chickory is less expensive per pound than ground coffee and you use less of it. Chickory also doesn't make your system acidic like coffee and has a detoxifying effect on the liver, so it's a healthier option!
Most mornings, I make a cup of chickory in my keurig coffee maker. I use a refillable basket (if you don't have one of these, you need to get one!) and a large mug. I start with the smallest cup option on my machine: 8 oz.
This first infusion saturates the ground chickory. After letting that sit for a few minutes, I run another small or medium (8 or 10 oz.) option through the same grounds. This method extracts more of the flavor from the grounds.
You can combine ground chickory with coffee if you prefer and that's how the brand "Coffee Partner" is marketed. But I like the flavor so well that I most often just drink it by itself! You can find ground chickory through internet sellers or (sometimes) in the coffee section of your grocery store.

Another coffee substitute I've found is called "Dandy Blend."


Dandy Blend is an instant beverage: all you do is add hot water! It's a combination of chickory root and dandelion root. In addition to the benefits of chickory, dandelion root has it's own detoxifying properties and is good for the liver, kidneys and digestive system.
Dandy Blend is more expensive than plain, roasted chickory root, but it's instant so there is a convenience factor involved.
So pick a coffee substitute and enjoy!


For really good information on an alkaline diet visit liveenergized.com

Saturday, March 10, 2018

Homemade Ranch Dressing


Save money and eat healthier with this homemade dressing recipe! No sugar, no MSG, (which is in a lot of popular dressings) and no hydrogenated oils.


You'll need:

3/4 cup milk
1 1/4 cup mayonnaise
1 T. onion powder
1 T. dried parsley
1/2 t. dried basil
1/2 t. dried oregano
salt and pepper


Add milk, herbs and spices to a canning jar. A pint (16oz) jar is 2 cups so you don't have to measure the milk; simply fill the jar less than 1/2 full. Screw the lid on tight and shake vigorously. Remove the lid and fill the jar almost to the top with mayonnaise. Shake again to incorporate the mayo.


This dressing benefits from sitting in the refrigerator for 30 minutes or more. This step is not necessary, but alllowing the mixture to sit for awhile will help it set up and thicken.

* If you are using this dressing for cooking, like in my favorite Chicken Dip, cut back on the mayo a little and increase the milk. It makes a runnier dressing but heats up better.


Substitutions:

This recipe (like a lot of my other recipes) is not a precise combination and you can substitute quite a few ingredients depending on what you have on hand.

  • Milk - You can use 1/2 & 1/2, cream, yogurt or sour cream if you happen to be out of milk.
  • Mayonnaise - I do prefer the taste of mayo in my dressing but in a pinch, yogurt or sour cream will work.
  • Onion Powder - this ingredient is really key to a traditional ranch dressing. Garlic doesn't give the same flavor. If you have no onion powder, you can finely mince fresh onion as a substitute. Dried minced onion also works but you can't skip the refrigeration period as the minced onion has to have time to soften and meld with the other flavors.
  • Herbs - Use any combination of the following: parsley, basil, oregano, thyme, garlic, etc. Add more if you like the flavors!

Use this ranch dressing on your favorite salad or in recipes like my Chicken Dip!


Chicken Dip Recipe

This dip is one of our family favorites. It is quick and easy to make and only uses 4 ingredients! If you serve it with vegetables for dipping it's a low carb/keto option.

You'll need:

2 - 8 ounce blocks of cream cheese
1 cup ranch dressing (check out my recipe for home made ranch dressing here)
1 can of chicken breast, drained
Tabasco sauce to taste

Add the ranch dressing and cream cheese to a small saucepan and heat slowly. Be sure to stir this often. As the cream cheese is melting, you can drain the chicken. Break the chicken chunks up into small shreds with a fork. When the cream cheese is melted and the mixture is smooth, add the chicken and mix thoroughly. Add about 1/4 tsp of Tabasco sauce; taste the dip and add more sauce if you like!

That's it! You can serve this dip with chips and/or veggies. I prefer colored sweet pepper wedges for dipping. The flavor combination is just right.