Search This Blog

Monday, August 23, 2021

When Not To Go Barefoot


 After barefooting for 3 years, I hate to admit that there are times and places when shoes are needed. Each one feels like a fail but, coming to grips with reality is important... and practical. Following are the main obstacles I encounter to barefooting:

1. Stores that require footwear. 

    Our town has one grocery store and I've been kicked out twice for barefeet! In the interest of time and efficiency, I now carry a pair of sandals with me. I should probably speak to the owner about the merits of barefooting, but I just don't have the time or energy for that one.

2. Dressy occasions.

    Basically, I just think it looks too casual to go barefoot when wearing a nice cocktail gown. Of course at most weddings, the shoes eventually come off anyway, but I always start with feet shod. Church is another event where I regularly opt for shoes. I may not be wearing a fancy dress, but it somehow feels too casual for bare feet.

3. Golf.

    I really like golfing barefoot. I think it actually helps with my game, but the amount of chemicals that are used on the grass of golf courses is too scary to risk. In Phoenix last year, I discovered that some courses even paint their grass in the winter! My feet were green (black really) for days after. That's when I finally decided it probably wasn't worth barefooting on the golf course. 

4. Rocky terrain.

    Sharp rocks and lots of big boulders all dissuade me from barefooting - at least for long periods or strenuous activities. Arkansas is an example of terrain that can be challenging to bare feet. All the seasoned barefooters say that your feet will toughen up and eventually be able to handle it, but I'm not there yet!

5. Desert terrain.

    Sand is easy, but often desert areas have horrible stickers and burrs. I've emerged from a walk with gobs of goatheads stuck to the soles of my feet! It's both painful and inconvenient. If there are any kinds of burrs or thorns, I wear shoes.

These exceptions may change as I progress on my barefoot journey. I still am unable to backpack barefoot. But, if you too are transitioning to a barefoot (or mostly barefoot) lifestyle, don't loose heart if there are some instances when you need those shoes!

I'll give a run down of the barefoot/minimalist shoes I have in a later post!


Monday, January 13, 2020

Bonaire 2020: The Dutch Antilles

A trip to the grocery store is a real cultural event in Bonaire. Influence from Holland is most prevalent with Dutch cheeses abounding!
Dutch chocolate also comes in many varieties and is a real treat. Most labels are in Dutch. Sometimes you can tell what a product is... and sometimes not!
The island has a large Asian population as well and the stores often carry a good selection of Asian foods. Some are difficult to identify - even when the name of the product is in English! We simply don't have the variety of roots, mushrooms and herbs that are found in China and elsewhere in the Orient.
One fruit native to Arkansas is the persimmon, but Chinese persimmons are 3 or 4 times the size of Arkansas persimmons.
This is a dried persimmon.

Milk only comes in A-Sep packaging and is all shelf stable until you open it.
Papiamento is the native language on the island, but Dutch is quite common and most people speak at least some English. 

Sunday, January 12, 2020

Bonaire 2020: Underwater Life

I never get tired of seeing all the fish and corals under the sea! The Caribbean is packed full beyond imagination and there is still plenty of room for more. Most of the time, divers are inconsequential observers and are basically ignored by the creatures we encounter.

Bonaire 2020: Acclimating

For our first day on the Island we planned an easy dive at Buddy's Reef. Our pre-dive check revealed a couple of problems with Ron's (brand new) gear. One issue was resolved with a quick switch of BCD hoses between Ron and his wife Connie. The 2nd issue, a missing O-ring on his BC, could not be mended before the dive. Connie, Fred and I made the dive without him and he snorkelers on top.
Like lots of other activities, diving requires a minimum of technical equipment. The safety check before a dive is critical to everyone's safety. The equipment and knowing how it works is part of the fun. Some folks get into it more than others and its amusing to watch the real "gear heads" suit up before a dive.
The minimum needed is a BCD (buoyancy control device,) a regulator (to get air from the tank to you,) weights and a mask. We also always dive with a wet suit and booties. 


Thursday, November 22, 2018

Blended Whiskey Sours

Our family has a holiday tradition of serving a whiskey sour "slush" before dinner at Thanksgiving and Christmas. Here is the recipe, courtesy of my brother Bert who is (mostly) in charge of this now.


Ingredients:


12 oz. can frozen concentrate orange juice.
big heaping spoonful of frozen limeade concentrate.
10 oz. of whiskey (more or less.)
ice
7-up

Adjust all the ingredients to your own taste and preference. Put everything in a blender and mix it to a slushie consistency! Enjoy!


Monday, November 19, 2018

Recycled Christmas Cards

Did you receive a nice stack of beautiful Christmas cards last year? Are you still hanging onto them?

Rather than throw them away, recycle them as gift decorations and tags this Christmas!  Cut the front (picture) off the card and place it on brown paper bags or plainly wrapped gift boxes.

You can also use the card to cover up store logos on the bags and boxes so that you can recycle paper products you might otherwise throw away.  Write the recipient's name on the card so that the decoration doubles as a gift tag.


Add tissue paper and ribbon to match the cards.

Choose cards that fit the size of your package or cut the cards to fit.

Use several cards as a collage to cover up a large imprint on a retailer's bag or box.


Cards can be cut into smaller pieces to use as hanging gift tags. Just punch a hole in one end and thread a ribbon or string through it. Fill in the back with your recipient's name and voila!


Keep your eyes open throughout the year for boxes and bags to use with this recycling project. Designate a box or tub in your storage unit to hold all the supplies until the next Christmas season arrives!

Sunday, November 11, 2018

A Neti Pot Made Simple

With cold and flu season upon us, this would be a great time to start using your Neti Pot on a regular basis. Flushing your sinuses will help cleanse bacteria from them as well as making it difficult for new bacteria or viruses to lodge and thrive in your system.

There are numerous posts and videos on the internet with instructions on how to use your neti pot, so I won't provide the basics here. What I do want to offer are some ideas and tips beyond the basics.

I try to use my neti pot at least once a week and more often if I feel stuffed up or like I might be fighting off an infection of some sort. A neti pot is just one more tool in your arsenal to help your body fight off viruses and bacteria. It helps your body do what it is designed to do naturally: fight off illness.


  1. Gather your materials before starting. You'll need your neti pot, your water source, baking soda and or salt, a spoon and a hankerchief all within easy reach.
  2. There is a long learning curve to neti pot use. You get better every time you use it. Give yourself plenty of tries to get it right. You really have to lean way over the sink - it's a little different for everyone.
  3. Don't use water that is too warm. If your flush stings or is uncomfortable, you may need cooler water. 
  4. Try baking soda instead of or in addition to salt. Baking soda has an alkalizing effect which makes it difficult for bacteria and viruses to survive. It also has a buffering effect which makes the flush a little easier on your sinuses.
  5. Expel the solution from your nose by blowing down into the sink. If you need to blow more, do it gently and expel from both nostrils at the same time. Blowing too aggressively or one side at a time forces the liquid into your Eustachian tubes. You might have a little drip minutes after you finish so keep your hanky handy.
  6. Use a cloth hanky instead of tissues. You'll go through a lot of paper tissues due to the amount of solution. A hanky is a more absorbant option and it's easier on your skin.
A plastic neti pot for travel

Those are my best practices for neti pot use. Don't give up! You'll be glad you worked this into your normal health routine. In addition to fending off illness you'll probably find that you breath easier and your sense of smell is improved after a nasal flush.

For other simple tips to avoid getting sick this winter, check out my list at https://practicallymargaret.blogspot.com/2018/06/strengthen-your-immune-system.html


Friday, October 26, 2018

Simple Fruit Fly Trap

This fruit fly trap works so well and costs almost nothing!


Fruit fly season is in full swing during the summer at my house.  If you eat and cook with fresh fruits and vegetables, you may be doing battle with them as well!  This simple to make trap will solve your problem!

You'll Need:

A wide mouth quart jar
A sheet of white paper
Tape
Bait - Almost anything that the flies are attracted to will work for bait. Wine, vinegar, fruit, etc. (Just use leftover items if they are available; no need to expend fresh resources on such pesky insects!)

Instructions:

  1. Form a sheet of white paper into a cone shape.  Leave the small end open no larger than the size of a pencil.  Tape in place.
  2. Place your bait in the bottom of the jar.
  3. Place the paper cone in the jar.  Be sure the bottom of the cone does not touch the fruit or liquid in the bottom.
  4. Place your trap in the location where you have the most fruit flies.  Flies will be attracted to the bright white paper and the smell of your bait.  When they make their way down through the cone they won't be able to find their way back out.


If you add a liquid to the jar rather than solid fruit, many of the fruit flies will drown in the jar. Either way, step outside before removing the cone from the jar so as not to release the flies back into your house!

Wednesday, October 24, 2018

Bone Broth Made Easy

Homemade bone broth is so satisfying and healthy. It is full of minerals and gelatin and flavor! - You can read all about that on other sites. - Bone broth (or stock) can also be a great way to use up scraps and leftovers. Here is a simple method that can be altered as you like:

Ingredients

Bones and meat scraps
Chicken feet
Vegetable scraps
Onion, Celery and Carrots
Apple Cider Vinegar
Slow cooker

Planning Ahead


1.) When you eat meat that has bones in it, save all the bones and put them in a container in the freezer. As you go through more bone-in foods, just keep adding the bones to your stash. If people have chewed on them, don't worry. They will be frozen and then cooked long so no contaminates will transfer to your broth.

Also, save any trimmings that you cut off meat: skin, fat, parts and pieces and add this to your freezer container.

2.) When you see a great sale on chicken, buy a few pieces of the cheapest cut (wings or legs) to add extra flavor to your broth. You can just reserve these in the freezer until broth cooking time. Also, pick up a package of chicken feet when you see them. You won't need many and usually a package will last for 4-5 batches.

3.) A week or so before making your bone broth, start saving the scraps and ends of vegetables that you might otherwise compost or throw away. I save almost everything except cruciferous vegetables (cabbage, broccoli, kale, cauliflower) as I don't like the flavor these impart to my stock. Keep these in a container in the refrigerator. If you are making bone broth pretty regularly you can just have an ongoing supply of these additions.

Making the Broth

 When you have plenty of bones, it's time to turn them into liquid gold! Place them in your slow cooker. Add 2-4 chicken feet, a couple of wings or legs and all your reserved vegetable scraps. Go through the refrigerator and find any leftovers that might be a good addition to the stock: green beans, tomatoes, zucchini, parsley or cilantro... almost anything that needs to be used up can go into the pot! If you add something that is highly seasoned, that will of course transfer to your bone broth so just be aware. Add some extra chunks of onion, carrot and celery.

Now cover the bones and vegetables with water. Don't add too much or your broth won't be very tasty. Just barely cover the majority of what's in the pot. Add 2 Tablespoons of apple cider vinegar. This helps leach all the minerals out of the bones. Let this all sit for 30 minutes to an hour to give the vinegar time to get working.

Turn the slow cooker on high until things get good and heated up then turn down to low and cook for about 8 hours. You can cook it all day or start the slow cooker before bed and let it simmer through the night.

Strain out all of the chunks and your broth is ready to eat or store! That's it!


Variations


One of the great things about homemade bone broth is that the variations are endless. You can use chicken, beef or pork bones or any combination. Did you forget to pick up celery? No problem, just leave it out. Do you like garlic flavor? Put a few cloves or a whole head in.

If you make a big batch, you can freeze the extra broth for future use. Just be sure to label it well. It's difficult to distinguish different stocks in the freezer!

Friday, September 7, 2018

Naturally Fermented Sour Kraut

Sour Kraut

If you are thinking of fermenting your own sour kraut, you probably already know all about the beneficial pro biotics and you might know how great it tastes. It's easy to make if you follow my practical instructions!

For 1 quart of kraut you'll need:

1 small to medium cabbage (the fresher the better.)
1 wide mouth quart jar
1 1/2 pint jar with lid for weight
Large mixing bowl
salt with no additives

Optional Equipment:

Kitchen scale
Electric Slicer
Fermenting Crock

Start by peeling off the outer leaves of your cabbage just to clean it up. Save the nicest piece of leaf to lay on top of your ferment. Cut out the cabbage core. Don't worry if you can't get it all.

Weigh the bowl you will be using to toss the cabbage and salt together. If your scale can measure in grams, use this setting. You can be a little more accurate with small measurements in grams. Write this number down.

Slice or chop the cabbage. The size is totally your own preference. I often slice mine with a kitchen knife but an electric slicer can save you time if you are processing 2 or more cabbages. When using an electric slicer, you will still need to chop some of the uneven pieces with a chef's knife.

Place all the cut cabbage into your mixing bowl and weigh it. Now subtract the weight of your bowl. The resulting number is the weight of your cabbage. Divide the cabbage weight by 50. This final number is the amount of salt you need to add to the bowl. This can be calculated in grams or ounces; just be sure you stay consistent! Here is the formula:

Grams of cabbage / 50 = grams of salt to add

Leave your bowl of cabbage on the scale and add salt slowly until the scale shows the grams needed. A word about salt here: most salt has additives to keep it from caking. Read your label carefully. Kosher salt, canning salt, table salt and some sea salt are all no-no's for sour kraut.

If you don't have a scale, you can still make sour kraut. A small head of cabbage takes about a Tablespoon of salt; a medium head, about 1 1/2 Tablespoons.


Once your salt is added, stir it in well. You can use a big spoon or just use your hand. Once the salt is incorporated well, you will feel that the cabbage is starting to sweat a little. Add the salted cabbage to your quart jar (or crock) one handful at a time, packing down each layer firmly. There is no need to pound the cabbage; just press down with the back of your hand or a wooden spoon. The goal is to leave no air space. A small to medium head of cabbage with fit in a quart jar. It looks like a lot after it's chopped but if you pack it in as you go, it will all fit!

You can use any glass or crock container for sour kraut. In these photos I'm using an antique crock that my mother in law gave me. (If you use something besides canning jars be sure to test them for lead with a test kit you can order online or pick up at some hardware stores.) You can also purchase special fermenting containers that have air-locks to help keep contaminants out of your sour kraut. Kraut is pretty forgiving so I encourage you to start with supplies you most likely already own before jumping into some high dollar equipment.

Once the jar is loaded, lay the reserved outer cabbage leaf on top. Press it down so it is snug on top of the chopped cabbage. (In these photos I have used a saucer that fits nicely inside my crock.) Fill your 1/2 pint jar with water and screw the lid on. This fits right into the mouth of the quart jar to weight down the fermenting cabbage. Place the fermenting jar in a pie pan or baking dish. Sometimes the water buildup is so great it overflows!


I like to leave my fermenting sour kraut in my kitchen until I see the water level rising above the chopped cabbage. This can happen right away or may take several hours. Once I see that it is well underway, I move it to a cooler location. My kitchen tends to be a little too warm for vegetable ferments. The refrigerator would be too cool to get the lacto-bacilli moving! A temperature range of 65-71 degrees is what you want. Also, keep your fermenting kraut out of sunlight.

I check my kraut about every 3 days. You can start to sample it after a week or so. When it reaches the flavor you like, just refrigerate it. It's that simple! I usually plan about 10 days to 2 weeks for mine.

If you find that your water level is decreasing, you will need to add a brine to keep the cabbage covered and out of the air. To make a brine, add 19 grams of salt to 1 qt. of non-chlorinated water. Add just enough of this solution to your jar to keep the cabbage submerged.

Monday, July 2, 2018

Things to Do Every Day

I have always been a list maker. (Well, ever since high school when our math teacher, Ben Meske, trained us to use lists.) A list keeps you accountable. Additionally, there is a degree of satisfaction when you actually cross an item off the list!

Recently, I decided to start a list for things I want to accomplish every single day. It's been a great tool and I find that I'm able to get more things accomplished, more projects finished and feel more satisfied with how my time is spent when I'm using this list!

So here is my list for reference. I found 10 things that I want to try to accomplish every single day. You may want to add or delete an item, but as you'll see it's pretty general and pretty universal; in a nutshell, it's pretty practical!

Pray: 

Rosary, Divine Mercy Chaplet, Mass
This is number one on the list because it is the most important. It's important enough that it probably shouldn't even have to be on a list. But here it is so it won't be forgotten.

Clean and/or Organize: 

Everyday housework comes first
I am a terrible house cleaner so this one has to be on my list. It's almost magical how often I can go a whole day without really doing housework! Sometimes, just getting the kitchen cleaned up good constitutes checking this off the list.

Exercise: 

It all counts!
Everyone knows that exercise needs to be on the list. If you don't plan for it (and sometimes even when you do have a plan for it) it won't happen. This item can sometimes be combined with another category. For example, a huge cleaning project might also be considered exercise! If you have a step tracker you might want to set a minimum for each day.

Work: 

Business job and volunteer jobs
As a business owner with a lot of flexibility, (read: I procrastinate a lot) it's sometimes important to have this on the list. On days when work isn't too demanding, I check in with one or more employees by calling or sending an encouraging email. The daily reminder to do some sort of work boosts productivity and moral... for my associates and for me as well.

Reach Out: 

Write a letter, send a text or email, call, visit
Someone out there needs to you - or at least needs to hear from you. Don't put it off. Reaching out can be as minor as sending a sick friend a text, or as monumental as planning a party in someone's honor. Your effort at connecting with other people helps them and you! You bring meaning to your own life by living out Christ's command to love others as you love yourself.
This is a good one to combine with other categories as well. For example if you hike with a friend it counts as Reaching Out and Exercise!

Create: 

Paint, sew, play music, garden, write
Don't leave this one off the list; it's that important. Young parents might be creating art with their toddler but nonetheless, it is creating! A splendid meal that you prepare can be a creation. If you aren't creating something good and beautiful (almost) everyday, you aren't living life to it's fullest! Trust me, the satisfaction you'll reap from incorporating this into your daily routine with be worth all the effort.

Read: 

"Leaders are readers!" Dave Ramsey
I know, sometimes there just isn't time for reading... well, "boo hoo." Just do it! You don't have to finish a Jane Austen novel every week to count this task as complete. Set a minimum amount of time (or pages) and squeeze it in right before bed if you have to. I read a lot at bedtime and it actually gets me in bed and asleep sooner than not. You'll be smarter, braver and happier the more you read. (Need I add here that the book selections you make do matter? Garbage in, garbage out... nuf said.)

Hydrate: 

2 quarts water per day
This one is so important for your health. Days that you drink adequate quantities of water are so much better than when you try to function in a dehydrated state. Generally, you need to consume 1/2 your body weight in ounces everyday. Try starting with a full quart of water when you first wake up - before coffee or tea or breakfast.

Love Your Spouse:

Do something, say something or give something just to make them feel appreciated, loved, respected
Being conscious about doing something nice or offering a compliment to the person you live with can make a big difference in a relationship. Again, it probably shouldn't need to be on a list, but by giving it priority every single day, you'll be surprised at how much more often it actually happens!


Express Gratitude

So this one came later than the others but every day I try to count my blessings! This one is simple to combine with other daily goals. Perhaps I send a heartfelt thank you letter to a friend so it doubles as reaching out. Sometimes I run through a long list in my heart thanking God for all he has bestowed on me so it counts as prayer too! And sometimes I tell my husband how thankful I am for him or something he has done. Get the picture? Even though it combines well into other daily tasks, I find that if I'm not intentional about expressing gratitude it may not happen often enough!

***

That's it! Keep your list practical and don't fret if you don't check everything off every day! I found that the Google app called "Keep" is great for this list. It's on my phone and at the start of each day I can go in and uncheck all the items to begin again fresh!

Thursday, June 28, 2018

Strengthen Your Immune System

...and Quit Getting Sick!


The common cold. It's inconvenient and annoying. And if you have kids in the house, it seems to come around way too often.

You can try to limit your exposure to viruses, but the truth is that most people are exposed all the time. Some folks get sick and others don't. The reality is that your ability to fight off infection has more to do with your own immune system than with who or what you come into contact. Our bodies are made to fight off viruses and other infections. But most people have compromised their immune system through bad nutrition and unhealthy habits.

Some

 practical lifestyle changes ...

can insulate you against the common cold and other viruses and make you healthier in the long run. Now, I say these are practical tips, but not all of them are easy. I've listed them roughly in order of importance.

Quit Eating Sugar:

This one step can make all the difference to your immune system. But let's be honest here; this is a difficult life adjustment. Cutting out sugar in all it's forms (honey, syrup, most fruit, etc.) is kind of a big deal. For starters, sugar is one of the most addictive substances available. For another, there is very little support in our lives for this decision. I quit eating sugar several years ago and I still have friends who are personally offended when I (politely) decline their sugary, homemade desserts. You have to make the leap here and just do it. Commit to it and get over the cravings. You won't be sorry.

I recommend finding information about the evils of sugar in books and on the internet. Keto and Paleo diet websites are a good place to begin. By arming yourself with information on why sugar is a poison to your system, you'll have an arsenal of reasons to stick with this lifestyle change.

Drink Plenty of Water:

Most people live their lives in a perpetual state of dehydration. The general rule of thumb for how much water to drink is calculated by dividing your body weight in half and converting the number to ounces. For example, if you weigh 120 lbs, half of that is 60 - so you need 60 ounces of water each day. If you are exercising or in the heat, you'll need more. 

You shouldn't drink water with food as this dilutes your digestive enzymes. One trick to get enough is to drink a quart or more of water right when you get up. This is easiest to do before you eat or have your morning coffee or tea. 

Water will help hydrate your cells so they work at peak efficiency and also aids digestion. Both of these operations insure that your body is flushing out toxins that can make your immune system sluggish.

Get Adequate Sleep:

Sleep restores the body and mind which accomplishes 2 things. All your organs can detox and reset giving your body tissues what they need to fight off invaders. You also get an emotional break which lowers your stress levels and allows your hormones to be used to keep you healthy rather than to survive emotional turmoils of the day.

Don't compromise on the 8 hour (or more) sleep rule. It may feel like you need to cut your sleep time short to enable you to check everything off your to-do list but in the long run, you'll be more efficient when you get an adequate amount of sleep.

Tongue Scraping:

This is a trick that most folks don't know about. Your tongue catches and accumulates all kinds of toxins to keep them from entering your system. Tongue scraping each morning helps rid your system of pathogens daily. You'll need to purchase a tongue scraper for this and each person in the family should have their own. It's easy to use and pretty easy to work into your morning routine. Just do it before you brush your teeth every morning.


Gargle:

 Gargle with plain water and do it every time you brush your teeth. After your tongue, your throat is the next line of defense against viruses and many bacteria. Tonsils and adenoids are located in the throat for this very reason. Additionally, the throat glands are an exit point for germs and toxins that the body is trying to eliminate. Gargling gently cleanses this area of our body and helps expel what our throats and the back of our mouth have trapped. Be aggressive about this and make a lot of noise doing it to ensure that you get as deep into the throat as possible.

Use a Fingernail Brush

Regular hand washing is good but scrubbing under and around your fingernails once a day. I like to do this in the evening. This way, anything I've picked up over the course of the day gets washed away before I climb into bed. The area underneath your fingernail harbors way more bacteria than the rest of your hand. Regular hand washing with soap is important but, based on bacteria count, scrubbing your fingernails is literally hundreds of times more important!

Use a Neti Pot

A neti pot flushes your nose and sinus cavities. This area, like the tongue and throat, helps stop germs before they enter your body as well as expel toxins from inside the bloodstream and organs. Occasional flushing helps move pathogens out before they have a chance to grow, invade or spread.

You can purchase a neti pot at drugstores or online and there are plenty of instructions online for how to use them. Unless you have a chronic sinus condition, daily use of a neti pot isn't necessary. I use mine every week or two; more often if my sinuses seem congested.


That's it! 7 practices to add to your life. Turn them into habits and you'll be sure to reduce (or eliminate) the occurrence of illness in your home! 

Thursday, June 7, 2018

Slow Cooker Chicken and Spinach

Like many slow cooker recipes, this one takes a little preparation, but it's great to come home to a (mostly) prepared meal when you need to be away right before supper!

The recipe serves 2 but I add extra chicken so that I have leftovers to make other recipes. You can save money by purchasing a whole chicken and cutting it into pieces yourself. 

This Slow Cooker Chicken and Spinach recipe can be the start of a meal progression that spans several days if you plan ahead. Here's an example of what I mean:

Day 1: Crockpot Chicken and Spinach (with extra chicken.)
Same night: Chicken bone broth with added pieces.
Day 2: Chicken Salad with leftover chicken.
Day 3: Chicken Vegetable Soup.

I'll expand more on this in another post. For now, lets look at what you need for the

Chicken and Spinach Recipe:


1 Whole Chicken, cut up (or about 8-9 pieces of chicken.)
Salt & Pepper
1 large onion, chopped
1 T. butter or lard
8 garlic cloves, sliced
4 t. tomato paste
1 t. paprika
1/4 t. crushed red pepper
1/2 c. water
8-12 oz. fresh spinach
1/2 c. raisins
Juice of 1/2 lemon
2 T. sunflower seeds (pecans or pine nuts work as well.)

Cut up chicken and generously season pieces with salt and pepper.

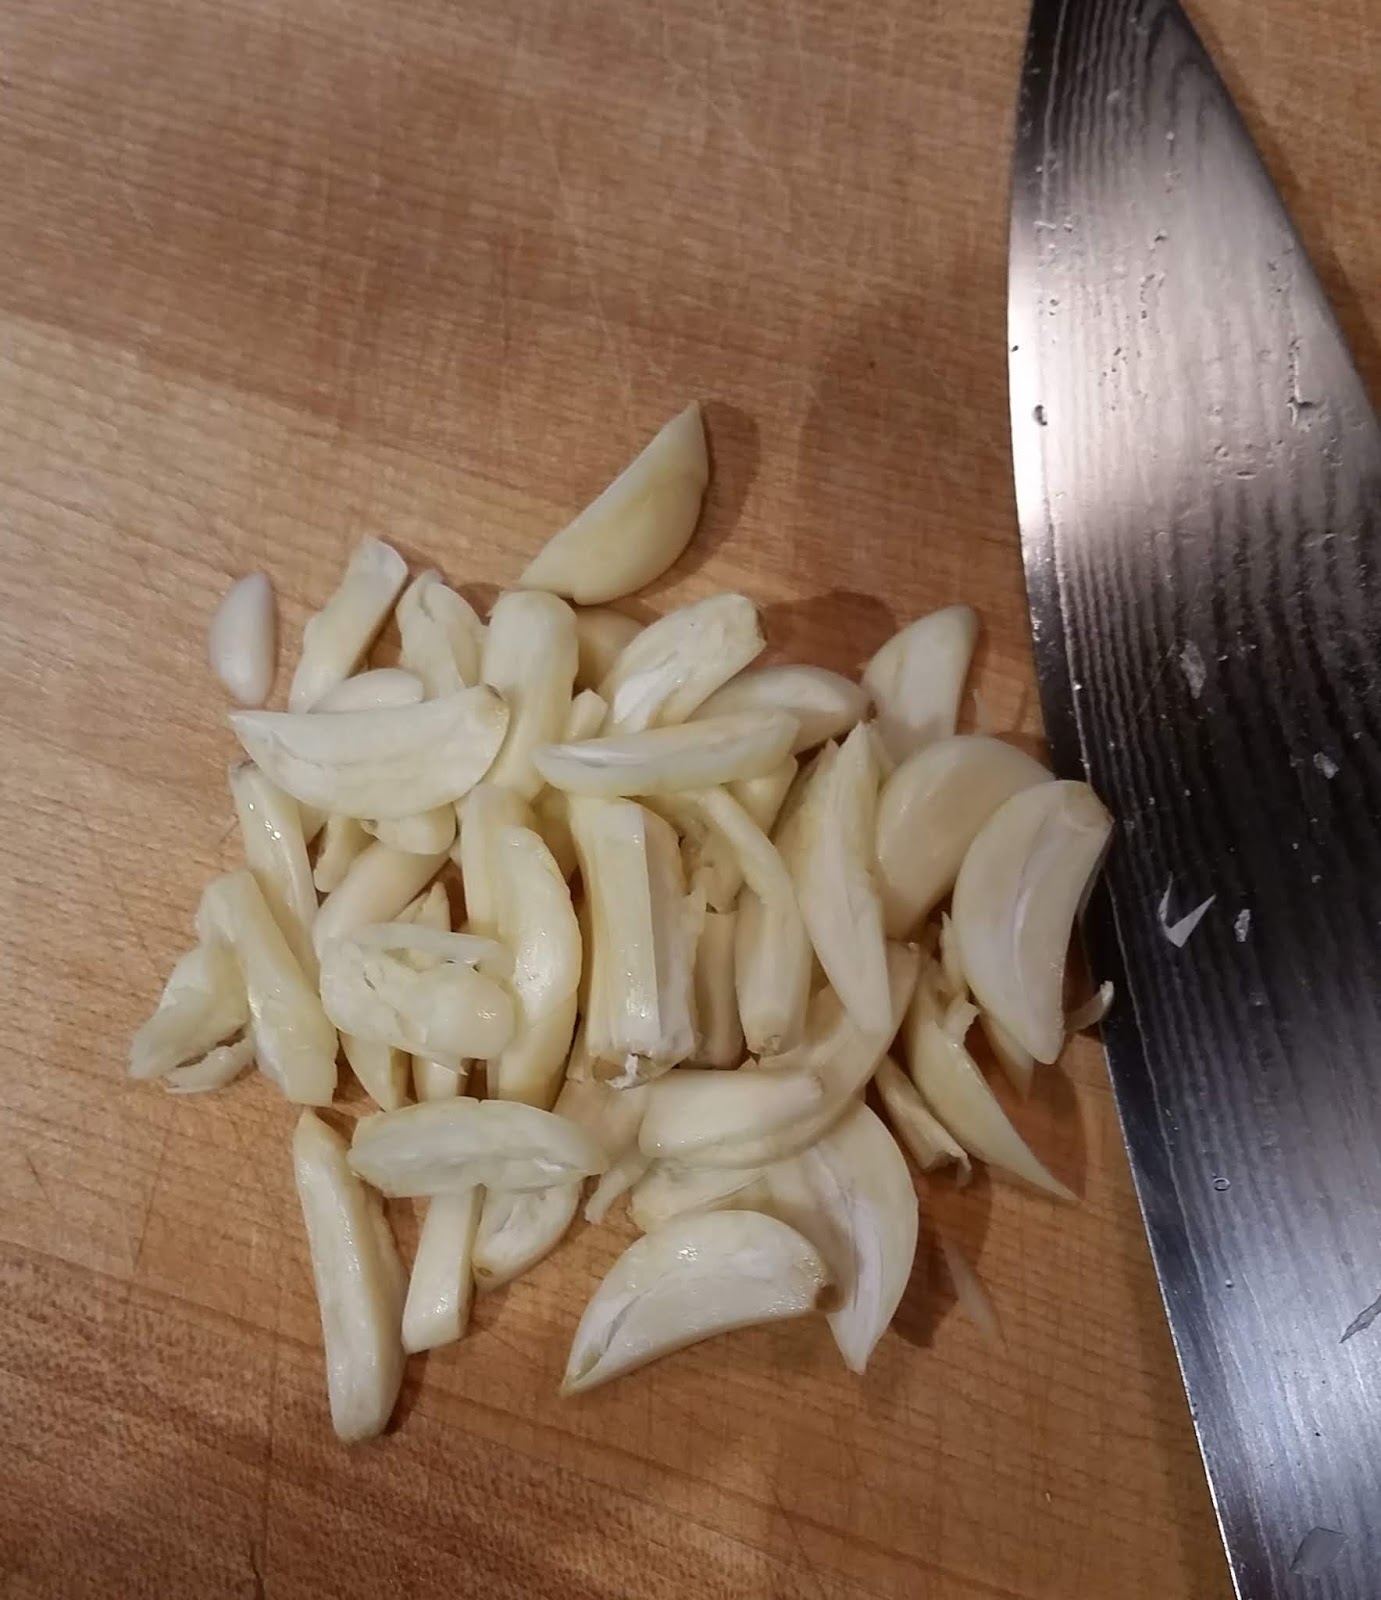
Heat butter or lard in a frying pan. Add chopped onion and cook for a few minutes. Add sliced garlic and cook until starting to brown.
Sliced garlic is a nice alternative to crushed or minced.

Add tomato paste, paprika and red pepper to frying pan, stir to incorporate. Add 1/2 c. water and mix well.
Pour tomato mixture into slow cooker. Add chicken pieces, turning them over to coat with sauce. Cook on low about 3 hours.
Pull out chicken and add fresh spinach to slow cooker, stirring to coat with remaining sauce. Mix in raisins. Lay the chicken back in the cooker on top of spinach. Cover and cook on high another 20 minutes or so.
Remove chicken to a serving plate and stir lemon juice and nuts into spinach. Serve.


The Best Homemade Mayonnaise


If you are interested in making your own

mayonnaise

 this is the best recipe and method I have found.
I'm not going to reprint it; just visit this link!

It's the best!

You'll love it!

https://howtofeedaloon.com/classic-homemade-mayonnaise/

(This mayonnaise is great in my Ranch Dressing recipe or Chicken Salad!)


Friday, May 18, 2018

Crock Pot Ratatouille

Just in time for the burgeoning farmers' markets, you'll want to try this

Ratatouille!


This recipe does involve a lot of chopping! Since you can make it ahead it's a great choice for a busy day!

One recipe will serve 4 people as a main dish and 6 as a side veggie, so cut it in half if there are only 2 or 3 of you.

1 med. eggplant (about 1 lb.) cut into 3/4" pieces.
1 1/2 t. Salt.
3 T. Olive Oil.
2 T. Tomato Paste.
1/4 t. Pepper.
5 Roma Tomatoes, diced.
2 med. zucchini and/or yellow summer squash, cut into 3/4" pieces.
1 lg. Sweet Pepper (red, orange or yellow) cut into 1/4" pieces.
1 lg. Onion, sliced into half-moons.
4 lg. Garlic Cloves, sliced.
1 t. Dried Thyme (or 1 T. fresh, chopped.)
1 Bay Leaf.

Fresh Basil Leaves for garnish.

Place the eggplant in a colander set over a bowl and toss with 1 t. of the salt. Allow to sit and drain for at least 30 minutes. Rinse with cold water. Lay the eggplant out on a towel and pat dry.

Whisk together oil, tomato paste, 1/2 t. salt and pepper.

Combine the drained eggplant, tomatoes, squash, sweet pepper, onion, garlic and thyme in a slow cooker. Add the oil and tomato paste mixture and stir to incorporate. Cover and cook on low for 4 hours. Uncover and cook 1 hour more to cook down some of the liquid.

Remove the bay leaf. Garnish with Basil (whole or sliced leaves.)

Taco Seasoning

OK, I don't know why I wasn't on this years ago, but in case someone out there still doesn't make their own

Homemade Taco Seasoning...


...here is a recipe to start with! 

These measurements make about 2 ounces, so double it to fill up a half pint jar. Use about 2 Tablespoons of the mixture per pound of meat when cooking.

As always on Practically Margaret, change up the ingredients and quantities to suit your own tastes (or to accommodate what you actually have in the cupboard!) Keep it practical and stress free!


2    T. Chili Powder
1    T. Ground Cumin
1    T. Salt
1/2 T. Pepper
1/2 T. Paprika (smoked, sweet or regular)
1     t. Dried Oregano
1     t. Garlic Powder
1/2  t. Onion Powder
1/8  t. Cayenne Pepper


Place all ingredients in a jar and shake to mix. Keep sealed and store with your other spices.


After you have your taco seasoning prepared, you'll be ready to make my

  Crockpot Taco Soup! 

It cooks all day and is ready for you when you want it. It also freezes well, so don't worry about left overs. Adios for now!

Friday, May 4, 2018

Easy Peel Hardboiled Eggs

Don't you hate it when you are peeling hardboiled eggs and 1/2 the whites come off with the peel? Especially when you are trying to make deviled eggs. Instead of looking like perfect little egg boats, they are one unappetizing mess!

Well, there are just a couple of secrets to making

 hardboiled eggs 

that 

peel clean and easy every time.


1. Start with boiling water.
2. Add a Tbsp. of baking soda.

That's it! Just to be clear, following are the step by step instructions:

The water needs to cover all of the eggs you'll be cooking, so add eggs to your pan and add water to cover them at least 1/2 inch. Pull out the eggs and leave them on the counter (not back in the refrigerator.) Add a tablespoon or so of baking soda to the water, cover with a lid and bring the pot to a boil.


When the water is at a full boil, carefully lower each egg into the pot with a slotted spoon. Do this slowly giving each egg a little time to adjust to the water as it is lowered. This helps keeps the eggs from breaking during the cooking time.


Replace the lid, cocking it just a little and allow the water to return to boiling. Lower the heat, keeping it just hot enough to continue boiling. Set your timer for 10 minutes. At the end of 10 minutes, remove the pot from heat, remove the lid and let it sit for a few minutes.

Pour off the hot water and add cold tap water to the pot. Pour off this second pot of water and add another round of cold tap water. Add a couple handfuls of ice cubes and let the eggs sit 10-15 minutes.

That's it! You can use the eggs right away or dry them off and store in the refrigerator.

Happy Peeling!


Wednesday, May 2, 2018

Kombucha Bottles and How To Get Them Clean

Probably the most practical way to store kombucha that I have found is in a half gallon jar with a plastic lid. I use this type of container a lot.

Growlers work pretty well too.

But I really like a little fizz in my kombucha and the container you use for your secondary fermentation and storage really does impact this feature of your beverage. I can't explain the science behind it, but a narrow mouth, long neck bottle gives the best fermentation. (Think beer or wine bottles.)
The Best Kombucha Bottles

The problem with using a lot of these types of bottles is cleaning them. 

A regular bottle brush just doesn't fit into the opening! I've tried several cleaning methods but my daughter Emily discovered the best one yet:

A Refrigerator Brush!
This handy device is long enough to reach into tall bottles. It bends (and straightens) easily so you can manipulate it to reach the bottom edges and all the sloping sides of your favorite kombucha bottle!
The Best Kombucha Bottle Brush

You can find one easily at Walmart for under $5! 
https://www.walmart.com/ip/Quickie-HomePro-Refrigerator-Brush-27/21048601


Monday, April 30, 2018

Kale Chips

Kale is an affordable vegetable that is usually available year round. It makes a great addition to stir fry and soups but my favorite way to prepare it is in the form of kale chips.

These are really easy to make! They keep fairly well and are great to keep in mind if you have kale in the refrig that needs to be used. Kale is full of vitamins and minerals. All that adds up to make kale chips a very practical recipe!

To make kale chips 

you'll need:

Kale
Olive Oil
Salt
(Other Optional Seasonings)


Start by washing and thoroughly drying your kale. I spread it out on a big tea towel and blot the leaves dry. Pull out the tough stem and then separate the larger leaves into manageable pieces. You can do this all by hand - grasp both sides of the leaf in one hand and gently tear the stem with the other hand.

Place your dry and de-stemmed kale in a big bowl. Spray or sprinkle olive oil over the top. Using tongs or your hands, toss the oil to cover all the leaves as thoroughly as possible. Add a little oil at a time until the leaves are fairly well coated. You'll be working with teaspoons of oil here, not cups.

Now sprinkle salt or other seasonings on the leaves. Toss again to cover the entire bowl full.

Place the kale in a dehydrator at about 130 degrees until dry and crispy. The time will vary based on your kale and dehydrator but you're looking at 2-3 hours for this.

If you don't have a dehydrator, you can dry the kale chips in your oven. Preheat the oven to the lowest setting possible. Spread your kale in a single layer on a baking sheet and pop them in the oven. Once in, turn the heat off. Remove the chips when they are crispy. If you have a lot of kale, you may need to turn the oven back on after it cools below 130 degrees to get to the desired crispiness!

That's it! Store kale chips in a sealed container so they stay fresh and crispy.

Seasoning Suggestions:

Salt and Pepper
Nutritional Yeast
Italian Seasonings